Fig.1 Empty Project BrowserIn order to enable a flexible management of model information and OCL specifications, OCLE allows the modeler to define them in separate files and then join them into a project. The same OCL file or UML model may be used in more than one OCLE project. OCLE overcomes the limitations imposed by the OCL grammar, allowing more specification files (containing OCL expressions which conform to the OCL grammar) to be compiled as a whole against the active UML model. An OCLE project may contain more than one UML model, out of which at most one is the active model. However, the modeler is not forced to create an OCLE project. UML models can be checked and edited without having to be included in a project. Similarly, the modeler may compile independent OCL files (see compiling independent files) and evaluate the expressions contained in them, as shown in using the OCL compiler.
An OCLE project comprises zero or more UML models and OCL specification files. The structure of the active project is displayed in the Project panel, which contains the project browser. This browser shows the files containing the project components. These files may be grouped in directories by a criterion chosen by the user. For more information about constraint files and how they are used in model checking, please consult editing OCL files and model checking.
The structure presented in the project browser will usually not match the file structure on disk. Files are displayed using only their short name. However, the project file stores the path to these files. To see the absolute path of a file included in the project, linger the mouse cursor over the file name and the tool tip will display it.
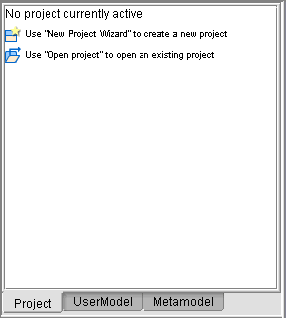
When the application starts, no project is opened or created. Therefore, the project browser looks like in figure 1 below.
 |
Fig.1 Empty Project Browser |
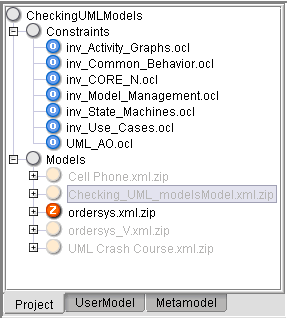
The browser displays the files contained in the project. The directories displayed in this browser are virtual directories, in the sense that they do not exist on disk (unless the user creates them); this facility is included only to allow users group their files. Figure 2 below displays the expanded project browser for a more complex model – the OrderSys model, included in the OCLE samples, in the 'Checking UML Models' directory. The project browser contains two directories, Constraints and Models which can be neither removed nor renamed. OCLE uses them as default locations for specification and model files respectively.
 |
Fig.2 Project structure |
You may notice that some files are grayed. This means that they are included in the project but not active; unactive files will not be taken into account when compiling OCL specifications (see using the compiler). Only the active UML model is not grayed.
To create a new OCLE project, select the New option from the Project
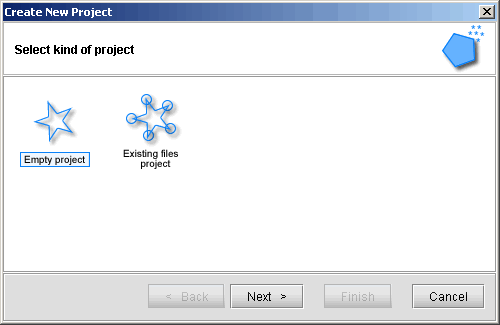
menu (or the corresponding  toolbar button). The New Project Wizard opens, as shown in figure 3 below.
 |
Fig.3 New Project Wizard |
You will first have to specify whether you want to create an empty project or to group existing models and OCL files in the newly created project. No matter what option you select, you will first be asked to provide the name of the new project and the location of the project file. Select no directory if you want the project file to be placed in the current directory (note that the 'current directory' is the directory from which OCLE was launched). If you choose the first option, OCLE will generate an empty model and automatically attach it to the new project (you will see it in the project browser). Two OCL files will also be generated and included in the project. One of them is meant to store the OCL rules expressed at the metamodel level and the other is designed to store user model specific constraints. You may want to add some rules in these files. Of course, at any time you may change the contents of these files or even remove them from the project and define your own project structure (see attaching and detaching OCL files).
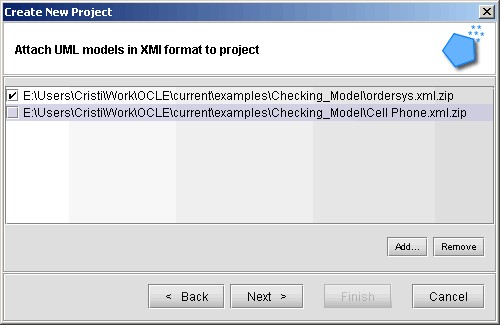
If you choose the second option, OCLE will ask you to select the UML model(s) and then the OCL files to be included in the new project. Multiple file selection is available in the selection dialog. Out of the selected UML models, only one can be active at any time. You will have to select the desired active model by clicking the appropriate check box, as shown in figure 4 below. With regards to the OCL files selected, you will have to specify which of them will be included in the compilation process. By default, all chosen files are checked, which means that all will be active and thus included in the compilation process.
 |
Fig.4 Attaching files to a project |
When browsing for UML models, the file selection dialog allows you to select both .xml and .xml.zip files, because by the default OCLE automatically zips the XML files containing UML models (see working with UML models). When browsing for OCL specification files, you may select both .bcr and .ocl files. Please refer to using the compiler for details about the meaning of these extensions.
To load an existing OCLE project, select Open from the Project
menu (or the corresponding  toolbar button). You will have to specify the location of an existing .oepr file (OEPR is
the default extension for OCLE project files). OCLE will try to open the
specified file; any error message encountered will be displayed in the
Messages panel at the bottom of the main window. If no load-time errors
occur, the contents of the chosen project will be displayed in the project
browser. If the project file specifies any active model, OCLE will try to open that model and if no errors occur,
the contents of the model will be displayed in the model browser.
When loading OCLE projects, the recent file list can be very useful. This list is available under the Open recent option in the Project menu. It displays the most recently used five project files. Please note that the recent files list is user-account specific, which means that different users will probably see different files listed in this menu.
To save your OCLE project, choose one of the options Save project or Save project as … in the Project menu. When saving a project, OCLE also tries to save the specified active model, if the model is included in the project.
The project browser offers a context sensitive popup menu that lets the user manage the project and the files associated with it. To create a new (virtual) directory inside an existing one, right click the chosen parent directory and select New directory from the popup menu. A default name will be generated for the new directory. If you are not satisfied with the generated name, directory names can easily be changed. To change the name of a directory, double click it and enter the new name. You can also remove a directory and its entire contents from the project. To do this, right click the directory name and select Remove from the popup menu. Please note that removing a directory from the project does not affect the contained files in any way – they are only not included in the project anymore. Particularly, the contained files will not be removed from disk. To remove a single file from the project, right click its name and select Remove, as in the case of directories.
OCLE can read UML models stored in XMI format (see working with UML models for details). To add a UML model to the active project, right click the Models directory (or one of its child directories) in the project browser and choose Add file(s). The XMI file selection dialog appears (see figure 4) and you have to follow the same steps as described above. If you check no model file in this dialog, the active model does not change; if you check a UML model from the list, that model will become the active model for the current project. You may however change the active model at any time. To do this, right click the model you want to activate and select Activate from the popup menu. Any previously active model is discarded.
To detach (remove) a UML model from the current project, right click the corresponding model file in the project browser and select Remove. If you remove the active model from the project, one of the remaining contained models will be activated. You may disable this default behavior by choosing Close and remove instead of Remove. In this later case, the active model will be closed, removed from the project, and no other model will be activated.
To add OCL text files to the active project, right click any directory having Constraints as a parent in the project browser and select Add file(s). The OCL file selection dialog appears. You will have to browse for OCL files and then check those files you want to include in the compilation process. Unchecked files will have their names grayed in the project browser. To remove an OCL file from the project, right click its name in the project browser and select Remove. You may however modify the compile configuration at any time. To do this, right click an OCL file in the project browser and choose Include or Exclude as appropriate.
Note : a more general way to add files to your project is to select the Add to project… option from the Project menu. Using this option you may add both OCL files and UML models. However, in this way you cannot specify the virtual directory where the added files will be placed. Therefore, any UML model files will be added in the Models directory, while any OCL specification files will be added in the Constraints directory.
 |
Back to main index |